backdrop-filterを完全マスター!8つのフィルターと実務に役立つ応用テクニック2選
ウェブデザインにおいて、背景をぼかしたり、透明感のあるガラス風のエフェクトを実装することは、近年よく見られる表現のひとつです。これを手軽に実現できるのが CSS の backdrop-filter です。
backdrop-filter を使うと、要素の背後にあるコンテンツにフィルターを適用し、ぼかしや明るさ調整などのエフェクトを加えることができます。 モーダルウィンドウの背景をぼかしたり、固定ヘッダーを半透明にするなど、デザインのアクセントとして活用できます。
本記事では、backdrop-filter の基本的な使い方から、実際にどのような場面で活用できるのかを具体的なコード例を交えながら紹介します。
この機能を適切に活用することで、デザインの質を向上させることができます。ぜひ backdrop-filter を使った表現を学び、ウェブサイトのデザインに活かしてみてください!
backdrop-filter とは?
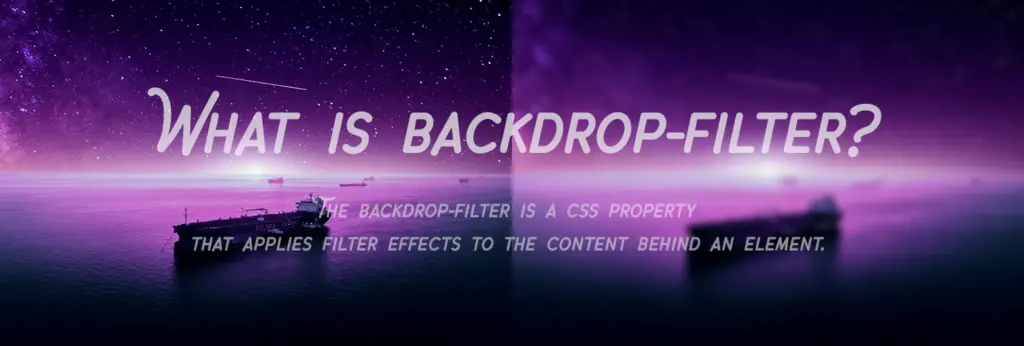
backdrop-filter は、要素の背後にあるコンテンツにフィルター効果を適用できるCSSプロパティです。背景をぼかしたり、色を調整したりすることで、コンテンツをより際立たせることができます。
例えば、モーダルウィンドウを開いたときに背景をぼかすことで、コンテンツを際立たせたり、固定ヘッダーに透明感のあるガラス風のエフェクトを加えたりできます。デザインのアクセントとして、近年のウェブサイトでもよく使われる表現のひとつです。
主に以下のようなフィルターを適用できます。
| フィルター名 | 効果 |
|---|---|
blur() | 背後の要素をぼかして視認性を向上させる |
brightness() | 背後の要素の明るさを調整する |
contrast() | 背後の要素のコントラストを強調または弱める |
grayscale() | 背後の要素を白黒に近づけて色彩を抑える |
sepia() | 背後の要素に茶色がかったレトロな効果を与える |
saturate() | 背後の要素の色の鮮やかさを強調または抑える |
hue-rotate() | 背後の要素の色相を指定した角度で回転させる |
invert() | 背後の要素の色を反転させてネガティブ風にする |
これらのフィルターが実際にどのように見えるかは、このあとのセクションで紹介します。
基本的な使い方
backdrop-filter を使うと、要素の背後にあるコンテンツにフィルター効果を適用できます。背景をぼかしたり、色を調整したりすることで、デザインに透明感を加えつつ、コンテンツを際立たせることができます。
例えば、次のコードでは、backdrop-filter: blur(5px) を使って、背景画像をぼかしながら、その上にあるボックスはくっきり表示します。
HTML
<div class="wrapper">
  <div class="blur-box">
    <p class="text">このボックスの背後にある要素は<br>ぼかされて表示されます</p>
  </div>
</div>
CSS
.wrapper {
  display: flex;
  justify-content: center;
  align-items: center;
  aspect-ratio: 740 / 320;
  border-radius: 5px;
  background: url(background.webp) no-repeat center/cover;
}

.blur-box {
  display: flex;
  justify-content: center;
  align-items: center;
  width: 70%;
  padding: 50px 0;
  border-radius: 5px;
  background: rgba(255, 255, 255, 0.5);
  backdrop-filter: blur(5px);
}

@media (max-width: 767px) {
  .blur-box {
    width: 80%;
    padding: 25px 0;
  }
}

.text {
  color: #31345e;
  font-size: 24px;
  font-weight: 700;
  line-height: 1.6;
  text-align: center;
}

@media (max-width: 767px) {
  .text {
    font-size: 15px;
    line-height: 1.5;
  }
}
以下は、上記のコードを適用した実際の見え方です。背景画像がぼかされて表示される一方で、ボックス内の文字はそのままの状態でくっきり表示されます。
このボックスの背後にある要素は
ぼかされて表示されます
これを実現するポイントは以下の通りです。
- 背景画像はボックスの親要素に設定し、
object-fit: coverを使って全体にフィットさせる。 - 半透明のボックスに
rgba(255, 255, 255, 0.5)を使うことで、背景が透けて見える。 - ぼかし効果は
backdrop-filter: blur(5px)で適用し、数値を大きくするほどぼかしが強くなる。
filter との違い
CSSには、backdrop-filter に似たプロパティとして filter があります。どちらも blur、brightness、contrast など、ほとんど同じフィルターを使用できますが、効果を適用する対象が異なります。
backdrop-filter | 要素の背後にあるコンテンツに効果を適用し、要素自体はそのまま表示される |
|---|---|
filter | 要素そのものに直接効果を適用する |
以下のコード例では、filter を使ってテキスト自体にぼかし効果を適用し、アニメーションで通常の状態に戻る動きを再現しています。
HTML
<div class="wrapper">
  <p class="blur-text">filter は、このテキスト自体に<br>効果を適用します</p>
</div>
CSS
@keyframes fadeBlur {
  0% {
    filter: blur(20px);
    opacity: 0;
  }

  20% {
    filter: blur(0);
    opacity: 1;
  }

  60% {
    filter: blur(0);
    opacity: 1;
  }

  80% {
    filter: blur(20px);
    opacity: 0;
  }

  100% {
    filter: blur(20px);
    opacity: 0;
  }
}

.wrapper {
  display: flex;
  justify-content: center;
  align-items: center;
  aspect-ratio: 740 / 320;
  border-radius: 5px;
  background: url(background.webp) no-repeat center/cover;
}

.blur-text {
  display: flex;
  justify-content: center;
  align-items: center;
  color: #fff;
  font-size: 28px;
  font-weight: 700;
  line-height: 1.7;
  text-align: center;
  filter: blur(5px);
  opacity: 0;
  animation: fadeBlur 5s linear infinite;
}

@media (max-width: 767px) {
  .blur-text {
    font-size: 16px;
    line-height: 1.65;
  }
}
以下は、上記のコードを適用した実際の見え方です。テキスト自体がぼかされた状態から通常の状態に変化し、その後再びぼやけて消えるアニメーションを繰り返します。
filter は、このテキスト自体に
効果を適用します
ポイントは以下の通りです。
filterは要素そのものに直接適用されるため、文字自体がぼやけて消えたり、くっきりと表示されたりする。- この動きは、
backdrop-filterでは実現できない。backdrop-filterは 「背景だけをぼかす」 効果なので、要素そのものの変化には使えない。
filter は、画像をホバー時にモノクロからカラーに戻したり、ぼかしからくっきり表示に変化させるアニメーションなどでよく使用します。
フィルターごとの見え方
CSS の backdrop-filter を使うと、さまざまな視覚効果を要素の背後に適用できます。以下では、代表的なフィルターを使用した際の見え方とその設定値を紹介します。それぞれのフィルターの違いを比較しながら、どのように使えるかを確認してみましょう。
blur
blur は、要素の背後にあるコンテンツをぼかすフィルターです。値が大きいほどぼかしの強度が増し、視覚的な奥行きや背景の分離感を強調できます。
blur
0px
blur
5px
blur
10px
blur は、実務でもっとも使用頻度が高いフィルターです。モーダルやメニューの背景に使うことで、コンテンツを目立たせつつ奥行きを演出できます。
brightness
brightness は、要素の背後にあるコンテンツの明るさを調整するフィルターです。1が標準の明るさで、0に近づくと暗くなり、1を超えるとより明るくなります。
brightness
1
brightness
0.5
brightness
2
contrast
contrast は、要素の背後にあるコンテンツのコントラストを調整します。100% が標準で、50% ではコントラストが弱まり、200% では色の差がより際立ちます。
contrast
100%
contrast
50%
contrast
200%
grayscale
grayscale は、要素の背後にあるコンテンツを白黒に変換するフィルターです。0% は通常のカラー、100% は完全な白黒となり、中間の値では色とグレーのバランスが調整できます。
grayscale
0%
grayscale
50%
grayscale
100%
sepia
sepia は、要素の背後にあるコンテンツにセピア調の色合いを加えるフィルターです。値を調整することで、色味の強さをコントロールできます。
sepia
0%
sepia
50%
sepia
100%
saturate
saturate は、要素の背後にあるコンテンツの色の鮮やかさを調整します。100% が標準で、0% では完全に無彩色になり、200% では色がより鮮明になります。
saturate
100%
saturate
0%
saturate
200%
hue-rotate
hue-rotate は、要素の背後にあるコンテンツの色相を回転させるフィルターです。値は角度(deg)で指定し、360度で元の色に戻ります。
hue-rotate
0deg
hue-rotate
90deg
hue-rotate
180deg
invert
invert は、要素の背後にあるコンテンツの色を反転させるフィルターです。0% は元の色、100% は完全に反転した色となります。
invert
0%
invert
50%
invert
100%
応用テクニック
backdrop-filter は、基本的な使い方だけでなく、ユーザーの視線を誘導したり、デザインに奥行きを与える効果的なテクニックとしても活用できます。ここでは、実務でも役立つ2つの応用例をデモとコードを交えて紹介します。
モーダルの背景をぼかす
モーダルの背景をぼかすことで、メインコンテンツとの区別がつきやすくなり、モーダルの内容がより際立ちます。ここでは、backdrop-filter を使ったモーダルの背景ぼかしのデモとコードを紹介します。

サンプルタイトル1
モーダルに backdrop-filter を適用すると、背後の要素がぼかされ、奥行きのある表現が可能になります。この効果により、モーダルの内容を際立たせつつ、背景との一体感を保つことができます。

サンプルタイトル2
モーダルに backdrop-filter を適用すると、背後の要素がぼかされ、奥行きのある表現が可能になります。この効果により、モーダルの内容を際立たせつつ、背景との一体感を保つことができます。
上のデモでは、モーダルを開くと背景がぼかされ、奥行きのある視覚効果が得られます。以下のコードは、このデモを実現するためのHTML、CSS、JavaScriptの構造を示しています。
HTML
<div class="wrapper">
  <section class="section">
    <div class="section-image"><span><img src="image01.webp" alt="サンプル画像1"></span></div>
    <div class="section-content">
      <p class="section-title">サンプルタイトル1</p>
      <p class="section-text">モーダルに backdrop-filter を適用すると、背後の要素がぼかされ、奥行きのある表現が可能になります。この効果により、モーダルの内容を際立たせつつ、背景との一体感を保つことができます。</p>
    </div>
  </section>
  <div class="modal-trigger"><button type="button">モーダルを開く</button></div>
  <section class="section">
    <div class="section-image"><span><img src="image02.webp" alt="サンプル画像2"></span></div>
    <div class="section-content">
      <p class="section-title">サンプルタイトル2</p>
      <p class="section-text">モーダルに backdrop-filter を適用すると、背後の要素がぼかされ、奥行きのある表現が可能になります。この効果により、モーダルの内容を際立たせつつ、背景との一体感を保つことができます。</p>
    </div>
  </section>
  <div class="modal">
    <div class="modal-inner">
      <div class="modal-overlay"></div>
      <div class="modal-content">
        <p class="modal-title">モーダルのタイトル</p>
        <p class="modal-text">これは backdrop-filter を適用したモーダルのデモです。<br class="br is-pc">モーダルを開くと、背後のコンテンツがぼかされ、より立体的な表現になります。<br class="br is-pc">この効果により、モーダルの内容が強調されるだけでなく、<br class="br is-pc">背景との一体感を保ちながら、視認性を向上させることができます。</p>
        <div class="close-modal"><button type="button">モーダルを閉じる</button></div>
      </div>
    </div>
  </div>
</div>
CSS
/* 改行 */
@media (min-width: 768px) {
  .br.is-sp {
    display: none;
  }
}

@media (max-width: 767px) {
  .br.is-pc {
    display: none;
  }
}

/* セクション */
.section {
  display: flex;
  align-items: center;
}

@media (max-width: 767px) {
  .section {
    display: block;
  }
}

.section-image {
  width: 50%;
}

@media (max-width: 767px) {
  .section-image {
    width: auto;
  }
}

.section-image span {
  display: block;
  position: relative;
  aspect-ratio: 1.4;
  overflow: hidden;
}

.section-image img {
  display: block;
  position: absolute;
  left: 0;
  top: 0;
  width: 100%;
  height: 100%;
  border-radius: 5px;
  object-fit: cover;
}

.section-content {
  width: 50%;
  box-sizing: border-box;
}

@media (max-width: 767px) {
  .section-content {
    width: auto;
    margin-top: 25px;
  }
}

.section-title {
  margin-bottom: 30px;
  color: #192753;
  font-size: 28px;
  font-weight: 700;
  line-height: 1.4;
}

@media (max-width: 767px) {
  .section-title {
    margin-bottom: 15px;
    font-size: 22px;
  }
}

@media (min-width: 768px) {
  .section:nth-of-type(2n+1) {
    flex-direction: row;
  }

  .section:nth-of-type(2n+1) .section-content {
    padding-left: 60px;
  }

  .section:nth-of-type(2n+2) {
    flex-direction: row-reverse;
  }

  .section:nth-of-type(2n+2) .section-content {
    padding-right: 60px;
  }
}

/* モーダルのトリガー */
.modal-trigger {
  margin: 40px 0;
}

@media (max-width: 767px) {
  .modal-trigger {
    margin: 25px 0 30px;
  }
}

.modal-trigger button {
  display: block;
  margin: 0 auto;
  padding: 15px 30px;
  border: none;
  border-radius: 5px;
  background: #4466ce;
  color: #fff;
  font: inherit;
  font-weight: 700;
  line-height: 1.4;
  text-align: center;
  text-decoration: none;
  cursor: pointer;
  appearance: none;
  transition: background-color 0.3s;
}

@media (max-width: 767px) {
  .modal-trigger button {
    padding: 15px 25px;
  }
}

@media (min-width: 768px) {
  .modal-trigger button:hover {
    background: #192753;
  }
}

/* モーダル */
.modal {
  display: flex;
  align-items: center;
  justify-content: center;
  position: absolute;
  left: 0;
  top: 0;
  z-index: 1;
  width: 100%;
  height: 100%;
  pointer-events: none;
  visibility: hidden;
  transition: visibility 0s 0.5s;
}

.modal-inner {
  position: relative;
  width: calc(100% - 60px);
  margin: 0 auto;
}

@media (max-width: 767px) {
  .modal-inner {
    width: calc(100% - 30px);
  }
}

.modal-overlay {
  position: absolute;
  left: 0;
  top: 0;
  width: 100%;
  height: 100%;
  border-radius: 5px;
  background: rgba(25, 39, 83, 0.85);
  backdrop-filter: blur(7px);
  opacity: 0;
  transform: scale(0.95);
  transition: opacity 0.5s, transform 0.5s;
}

.modal-content {
  position: relative;
  padding: 80px 0;
  color: #fff;
  pointer-events: auto;
  opacity: 0;
  transition: opacity 0.5s;
}

@media (max-width: 767px) {
  .modal-content {
    padding: 50px 0;
  }
}

.modal-title {
  margin-bottom: 30px;
  font-size: 28px;
  font-weight: 700;
  line-height: 1.4;
  text-align: center;
}

@media (max-width: 767px) {
  .modal-title {
    margin-bottom: 20px;
    font-size: 22px;
  }
}

.modal-text {
  text-align: center;
}

@media (max-width: 767px) {
  .modal-text {
    margin: 0 15px;
    text-align: left;
  }
}

.close-modal {
  margin-top: 40px;
}

@media (max-width: 767px) {
  .close-modal {
    margin-top: 30px;
  }
}

.close-modal button {
  display: block;
  margin: 0 auto;
  padding: 15px 30px;
  border: none;
  border: 1px solid #fff;
  border-radius: 5px;
  background: #fff;
  color: #192753;
  font: inherit;
  font-weight: 700;
  line-height: 1.4;
  text-align: center;
  text-decoration: none;
  cursor: pointer;
  appearance: none;
  transition: background-color 0.3s, color 0.3s;
}

@media (max-width: 767px) {
  .close-modal button {
    padding: 15px 25px;
  }
}

.modal.is-active {
  visibility: visible;
  transition: visibility 0s;
}

.modal.is-active .modal-overlay {
  opacity: 1;
  transform: scale(1);
}

.modal.is-active .modal-content {
  opacity: 1;
}

@media (min-width: 768px) {
  .close-modal button:hover {
    background: transparent;
    color: #fff;
  }
}
JavaScript
(($) => {

  const modal = (() => {
    function init() {
      $('.modal-trigger button').on('click', () => {
        $('.modal').addClass('is-active');
        return false;
      });

      $('.close-modal button').on('click', () => {
        $('.modal').removeClass('is-active');
        return false;
      });
    }

    return {
      init: init
    };
  })();

  if ($('.modal')[0]) modal.init();

})(jQuery);
これで、backdrop-filter を使ったモーダルの背景ぼかしが実装できます。ポイントは、modal-overlay に backdrop-filter: blur(7px) を適用し、モーダルを開いた際に .is-active クラスを追加して効果を表示させる点です。
ヘッダーに透過エフェクトを適用する
ヘッダーに透過エフェクトを適用することで、スクロール時に背景がぼかされ、より洗練されたビジュアルを演出できます。ここでは、backdrop-filter を使った固定ヘッダーのデモとコードを紹介します。
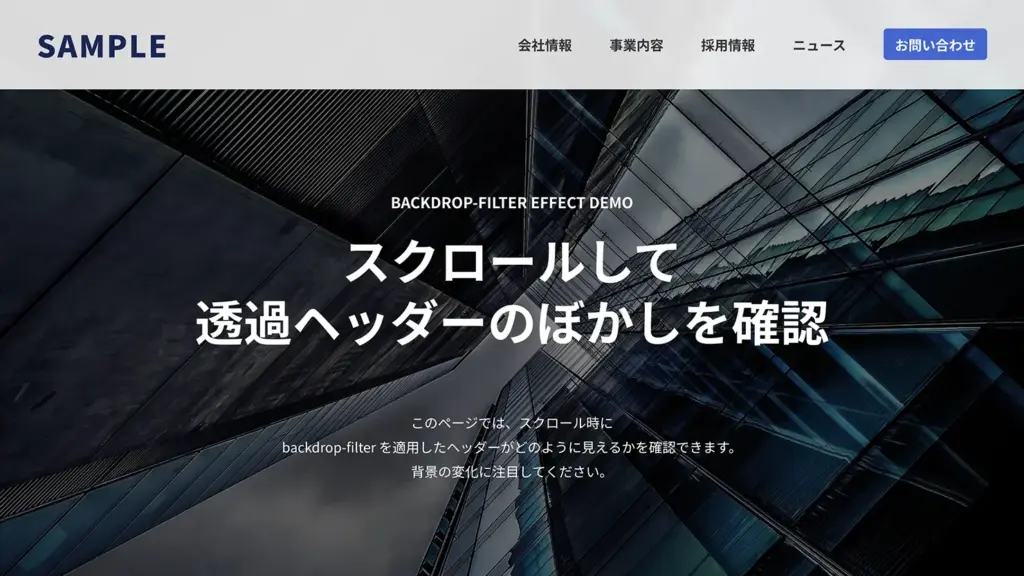
上のデモでは、スクロールするとヘッダー越しの背景がふんわりとぼかされ、透明感と奥行きが引き立ちます。以下のコードは、このデモで使用したHTMLとCSSです。ただし、ヘッダー以外の部分は今回の backdrop-filter に直接関係しないため、省略しています。
HTML
<header class="header">
  <div class="header-logo"><a href="#">SAMPLE</a></div>
  <nav class="header-nav">
    <ul>
      <li><a href="#">会社情報</a></li>
      <li><a href="#">事業内容</a></li>
      <li><a href="#">採用情報</a></li>
      <li><a href="#">ニュース</a></li>
    </ul>
  </nav>
  <div class="header-contact"><a href="#">お問い合わせ</a></div>
</header>
CSS
/* ヘッダー全体 */
.header {
  position: fixed;
  left: 0;
  top: 0;
  z-index: 1000;
  width: 100%;
  min-width: 1200px;
  height: 120px;
  background: rgba(255, 255, 255, 0.85); /* 半透明の背景 */
  backdrop-filter: blur(7px); /* 背景をぼかす */
}

@media (max-width: 767px) {
  .header {
    min-width: auto;
    height: 80px;
  }
}

/* ロゴ */
.header-logo {
  position: absolute;
  left: 50px;
  top: 50%;
  font-size: 40px;
  font-weight: 900;
  line-height: 1;
  letter-spacing: 2px;
  transform: translateY(-50%);
}

@media (max-width: 767px) {
  .header-logo {
    left: 20px;
    font-size: 25px;
    letter-spacing: 1px;
  }
}

.header-logo a {
  display: inline-block;
  color: #192753;
  text-decoration: none;
  vertical-align: top;
}

/* ナビゲーションメニュー */
.header-nav {
  position: absolute;
  right: 228px;
  top: 50%;
  transform: translateY(-50%);
}

@media (max-width: 767px) {
  .header-nav {
    display: none;
  }
}

.header-nav ul {
  list-style: none;
  display: flex;
  gap: 0 30px;
}

.header-nav ul li a {
  display: block;
  padding: 10px;
  color: inherit;
  font-weight: 700;
  line-height: 1.4;
  font-weight: bold;
  text-decoration: none;
  transition: color 0.3s;
}

.header-nav ul li a:hover {
  color: #4466ce;
}

/* お問い合わせボタン */
.header-contact {
  position: absolute;
  right: 50px;
  top: 50%;
  transform: translateY(-50%);
}

@media (max-width: 767px) {
  .header-contact {
    display: none;
  }
}

.header-contact a {
  padding: 8px 15px;
  border-radius: 5px;
  background: #4466ce;
  color: #fff;
  font-weight: 700;
  line-height: 1.4;
  text-align: center;
  text-decoration: none;
  transition: background-color 0.3s;
}

.header-contact a:hover {
  background: #192753;
}
ポイントは以下の通りです。
backdrop-filter: blur(7px);を.headerに適用することで、スクロールしたときにヘッダー越しの背景がぼかされ、自然な透明感が生まれる。- 背景には
rgba(255, 255, 255, 0.85)を設定し、白に近い半透明にすることで、背景の視認性を保ちつつ、テキストの可読性も確保している。 - ナビゲーションやロゴ、お問い合わせボタンはスクロールしてもそのまま表示され、背景だけがぼかされるため、ヘッダー全体がよりスタイリッシュに見える。
ブラウザ対応状況
backdrop-filter は、現在の主要なブラウザやデバイスで問題なく動作します。以下は、私が所有するデバイスで動作を確認した結果です。
所有環境と動作結果(2025年2月現在)
| デバイス | OS・ブラウザ | 動作状況 |
|---|---|---|
| PC | Chrome(バージョン133) | 正常動作 |
| Edge(バージョン133) | 正常動作 | |
| Firefox(バージョン135) | 正常動作 | |
| Safari(バージョン18.1) | 正常動作 | |
| スマホ | iPhone 15(iOS 18.1、Safari) | 正常動作 |
| Xperia(Android 13、Chrome) | 正常動作 | |
| タブレット | iPad(第5世代、iPadOS 16.7、Safari) | -webkit-が必要ありの場合は正常動作 |
- 現在の主要なブラウザおよび比較的新しいデバイスでは、基本的に
backdrop-filterは-webkit-プレフィックスなしでも正常に動作します。 - 古いデバイスやOSでは、
-webkit-プレフィックスを追加することで正常に表示・動作します。例えば、私の古いiPad(第5世代、iPadOS 16.7)では-webkit-をつけることで正常に動作しました。
現在の主要なブラウザでは -webkit- なしでも問題なく動作しますが、より幅広い環境でのサポートを考えるなら、以下のようにプレフィックスを併用するのがおすすめです!
.element {
  -webkit-backdrop-filter: blur(7px); /* 古いデバイス向け */
  backdrop-filter: blur(7px);
}
まとめ
今回は CSS の backdrop-filter の基本と応用を紹介しました。要素の背後にフィルター効果を適用することで、デザインに奥行きや透明感を加えることができます。
以前はブラウザの対応状況を気にしながらぼかしを実装する必要がありましたが、今では backdrop-filter を使うことで、主要なブラウザで手軽にぼかし効果を適用できます。
ぜひ、実務でも活用してみてください!
押していただけると励みになります!

